Use the Spot Healing Brush Tool to remove the green stem tips from an image of Gladiolus
Before you begin this exercise it is VERY IMPORTANT that you read the User Guide for the Spot Healing Brush Tool. This section of it is particularly important: Usage Tips.
The objectives and requirements of this assignment are to:
- To complete each specific instruction.
- To have a resulting image that looks believable and visually correct.
- Please view the rollover image below for an example of what is expected.
- Note that you will probably need to compromise the original image integrity. That cannot be avoided. Regardless, the result must look believable and visually correct. This can be done.
- Use an empty layer above the background image to do your removal work on.
- See the Usage Tips user guide section for information on how to do this.
- Do NOT paint directly on the background image.
- The file you submit must use the layer above the background image layer for the retouching work.
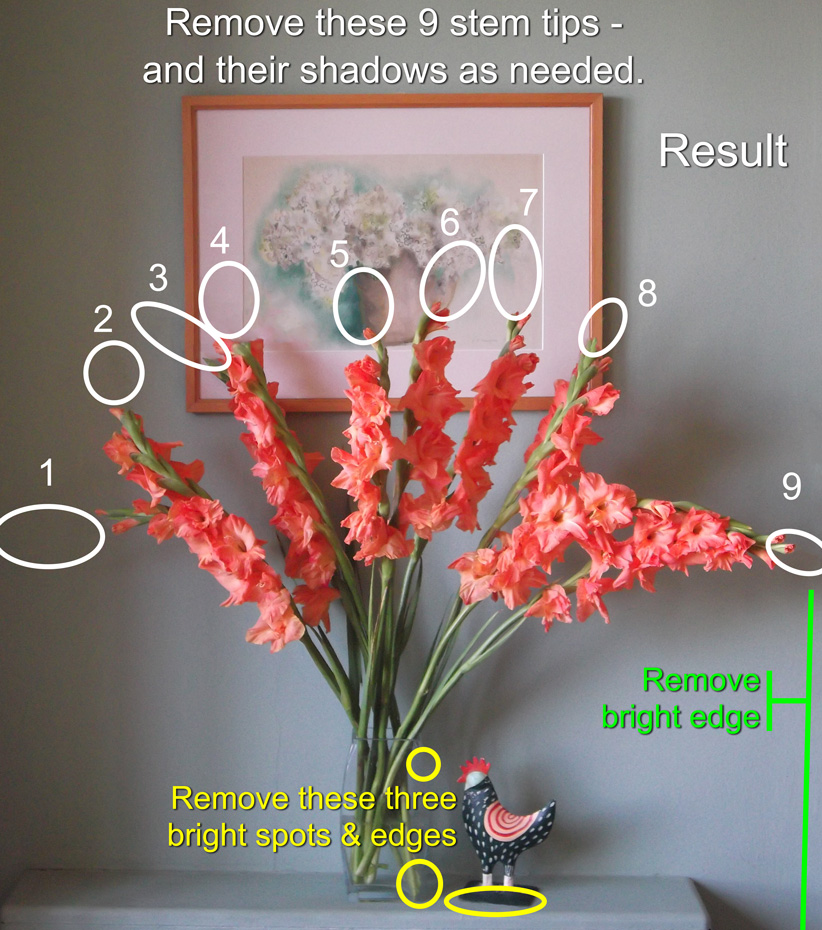
- Precisely remove:
- The green tips of the nine (9) white circled flower tops shown in the illustration:
- no more or less than those specific nine green tips.
- To remove the shadows on the background that were caused by the tips you removed.
- The three yellow circled bright spots.
- The bright edge indicated by the green information at the bottom right.
- The green tips of the nine (9) white circled flower tops shown in the illustration:
This is not an easy exercise
- It will take time to properly complete it.
- You must be patient. Do not get frustrated.
- Use the Undo/Redo commands often:
- Undo: Ctrl/⌘ - Z
- Redo: Ctrl/⌘ Shift - Z
- Use the Undo/Redo commands often:
- Vary the size and edge softness of the brush:
- Change the size of the brush holding down either of these keys: [ ]
- You will see a circular cursor.
- It will have white or black edges depending on the brightness of that par of the image.
- If you see a + sign cursor it means that the brush is tiny.
- To change the edge softness/hardness, use those keys AND the Shift key.
- Change the size of the brush holding down either of these keys: [ ]
- The areas where the stems overlaps the edges of the frame on the left and right sides of the frame are particularly difficult. You will probably need to undo/redo/erase a few times to make those locations presentable.
- If I were to do this professionally I would use a variety of other tools such as the Clone tool. The spot healing brush tool is intended for smaller image parts. However, this assignment is intended to get your very familiar with what this tool can do, how to set the brush size and softness controls, and how to use layers for this type of work.
- Begin by downloading this image.
- Save the image as:
yourlastname-spot-heeling-gladiolus.psd
For example, I would name my file:
vaughan-spot-healing-gladiolus.psd- IMPORTANT In the file saving dialog box you will need to deliberately set the Format to Photoshop at the bottom of the dialog box before you save the file.
-
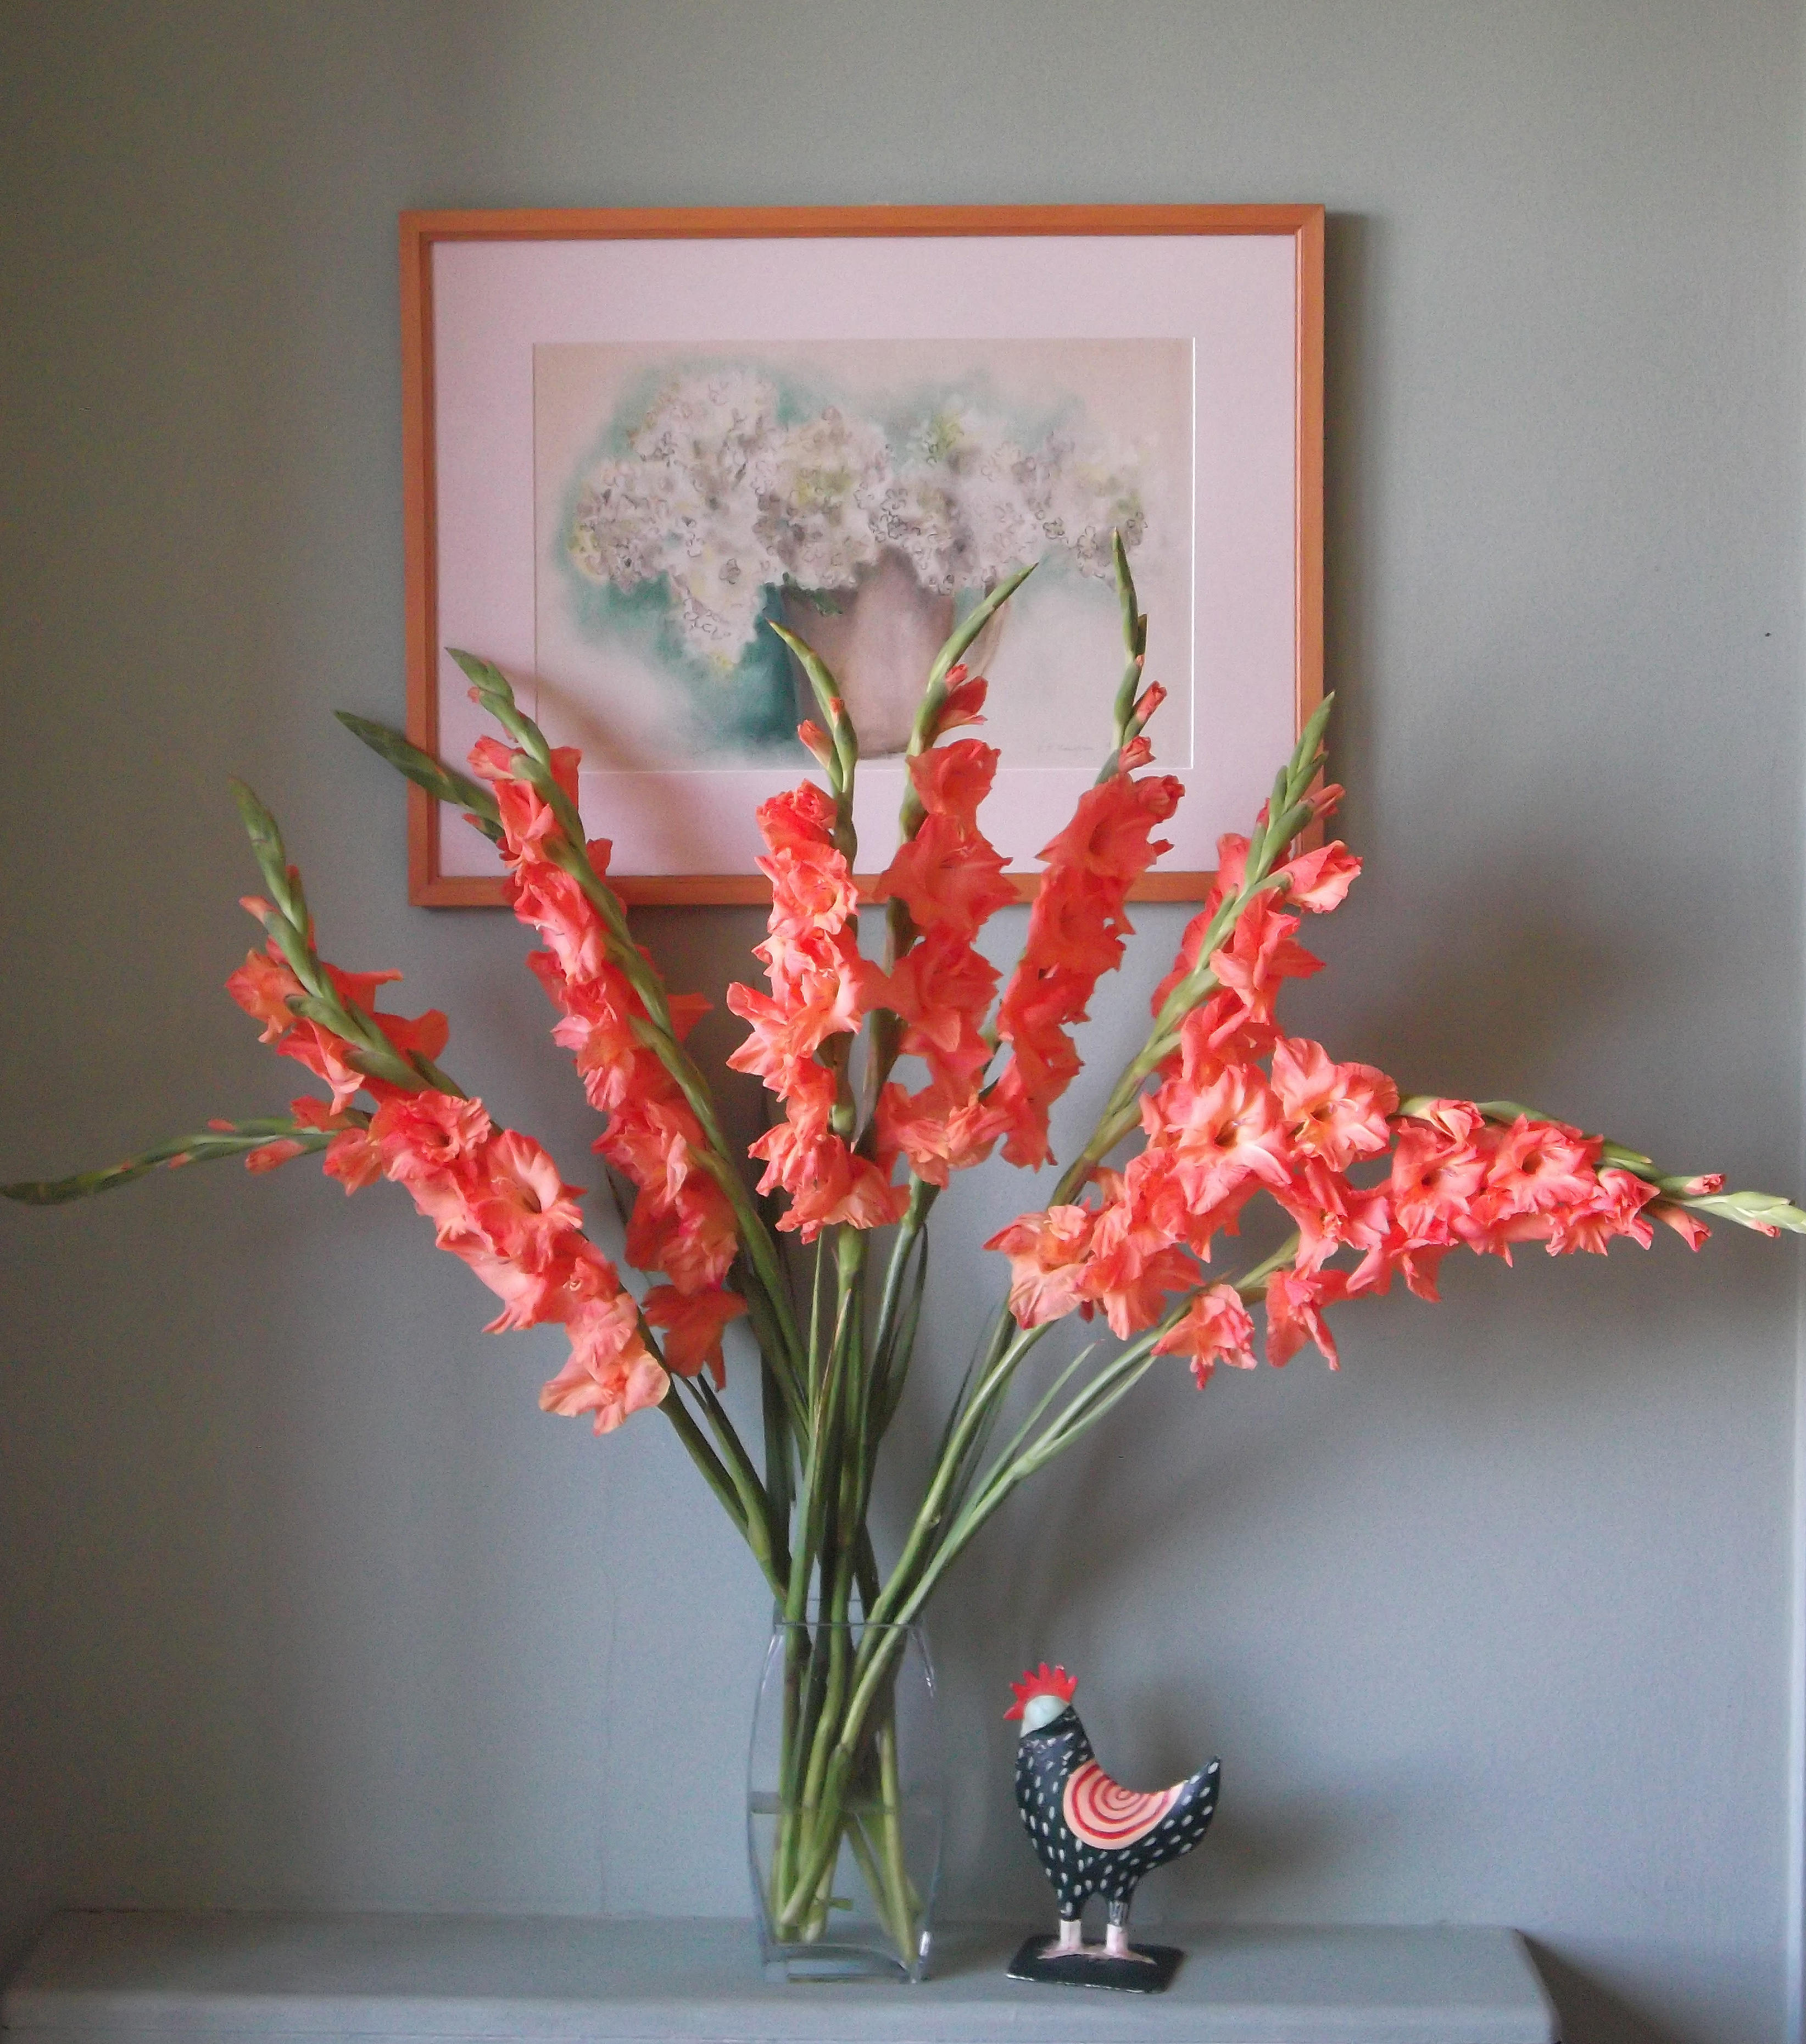
Next, view the rollover images below to see the before image and my results (After).
- I made the "After" image.
- It is not perfect, but I think it is believable and visually correct.
- Use the Spot healing brush tool to remove the green stem tips at the indicated locations.
- There are nine (9) location for you to do this.
- Before you do, and as already mentioned above, please follow the instructions in Usage Tips in the user guide to create an empty layer for your work to go on.
- Note that there are some shadows on the background from the plant parts that you remove. Please remove those shadows as needed.
- Submit your resulting yourlastname-spot-heeling-gladiolus.psd file.
Rollover this image to see the ORIGINAL and RESULT images:

© 2024 Dan Vaughan — Most recent proofing: 2024-02-05